How to Draw A Garden. Few things are as relaxing and fulfilling as growing your garden. You can choose from a huge range of different plants, flowers, and even vegetables to populate your garden, and it’s a great way to add some color and vibrant life to your garden.
Also, check our cat coloring page.
However, it can be expensive and time-consuming, so sometimes learning how to design a garden can be the next best thing!
How to Draw A Garden
Step 1
This garden you will be working on will be filled with some pretty simple flowers, and we will draw the first of them in this first step of our guide on how to draw a garden.
To start this flower, let’s draw a circle for the center of the flower. Next, we draw five large, round petals on the flower, and the petals on the right have small gaps.
These gaps will be there as these are the areas where the next flower will touch them.
So we finished this step by drawing straight lines for the stem and adding a leaf on the left side. So you’re ready to draw more flowers in the next steps of the guide, so let’s move on!
Step 2
Now that you’ve drawn a flower for your garden design, you shouldn’t have trouble drawing another one!
This flower will resemble the first one, just a little smaller.
The petals of this second flower will also fill in the gaps you left in the petals in the previous step. Also, this flower has two leaves on the stem instead of the first.
Step 3
Let’s draw another flower for the third step of our garden drawing guide.
This one is about the same size as the previous one, but the stem is slightly shorter, making this flower sit lower than the previous two.
Like the first flower, this one has a leaf on the left. There will also be a small gap on the right petal, and another petal will overlap.
Step 4
In this phase of your garden design, we draw the fourth flower. This flower is the same size and height as the second one and has two leaves like this one.
Then all that remains is to add a flower and a few final touches before adding some amazing colors to the image.
Step 5
It’s time to draw the final flower for this garden drawing tutorial! You understand how it works, so you shouldn’t have any problems with it.
This flower will be about the same height and size as the first, but unlike the first, it will have two leaves on the stem.
Once you’ve drawn all five flowers, you can add some final details in Step 6!
Step 6
All of your flowers are now drawn, so for this step of drawing your garden, we will finish with some final details before the final step.
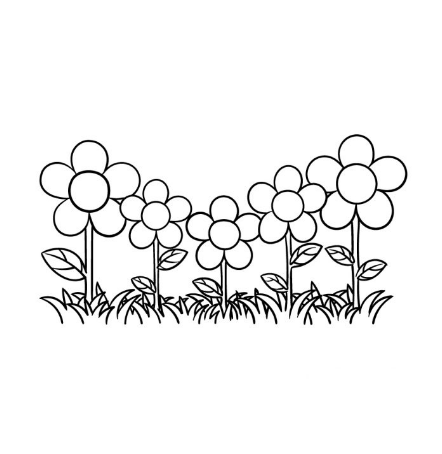
First, we will use a lot of hard lines and curves between the flowers to make some grass grow between them.
Next, we’ll add some vein detail over the leaves on the flower stalks for more realism.
Before we go any further, you should add a few details to top it off! You could adopt many ideas, and we will cover some of them now.
You could draw cute insects like butterflies and buzzing bees or draw a beautiful sky over the garden.
Another idea would be to draw a scene for it, which would be a wonderful option to add some of your famous flowers to the picture.
Step 7
You’ve reached the final step of this how-to guide on how to draw a garden! You can have fun adding amazing colors to your image for this step.
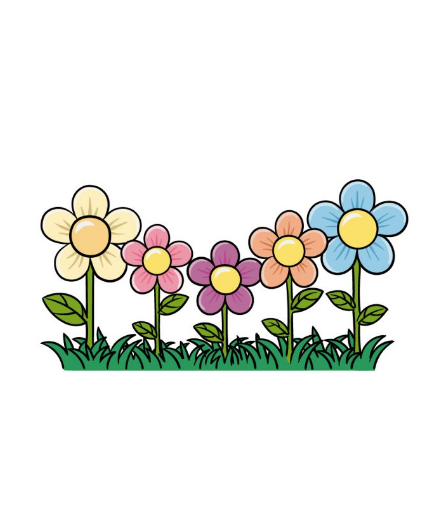
Our sample image showed you just one way to colorize your image with beautiful colors.
You can use these colors for your image, but feel free to experiment with your favorite colors to make this design stand out!
Then you can decide on the artistic tools and media you want to use for this image.
Watercolors and colored pencils are great for a softer look, while mediums like acrylics and colored pencils are great for lighter tones.
You can stick with one approach or mix both to give the image a beautiful, vibrant look.
Your Garden Drawing is Finished!